
Learn how to change the controls for Unseen Diplomacy 2 using SteamVR input.
In the latest patch we’ve added extra locomotion options and overhauled the way inputs are bound with the SteamVR input system. In this guide we’ll go over how to customise your controls and what the individual actions do.
Changing your controls
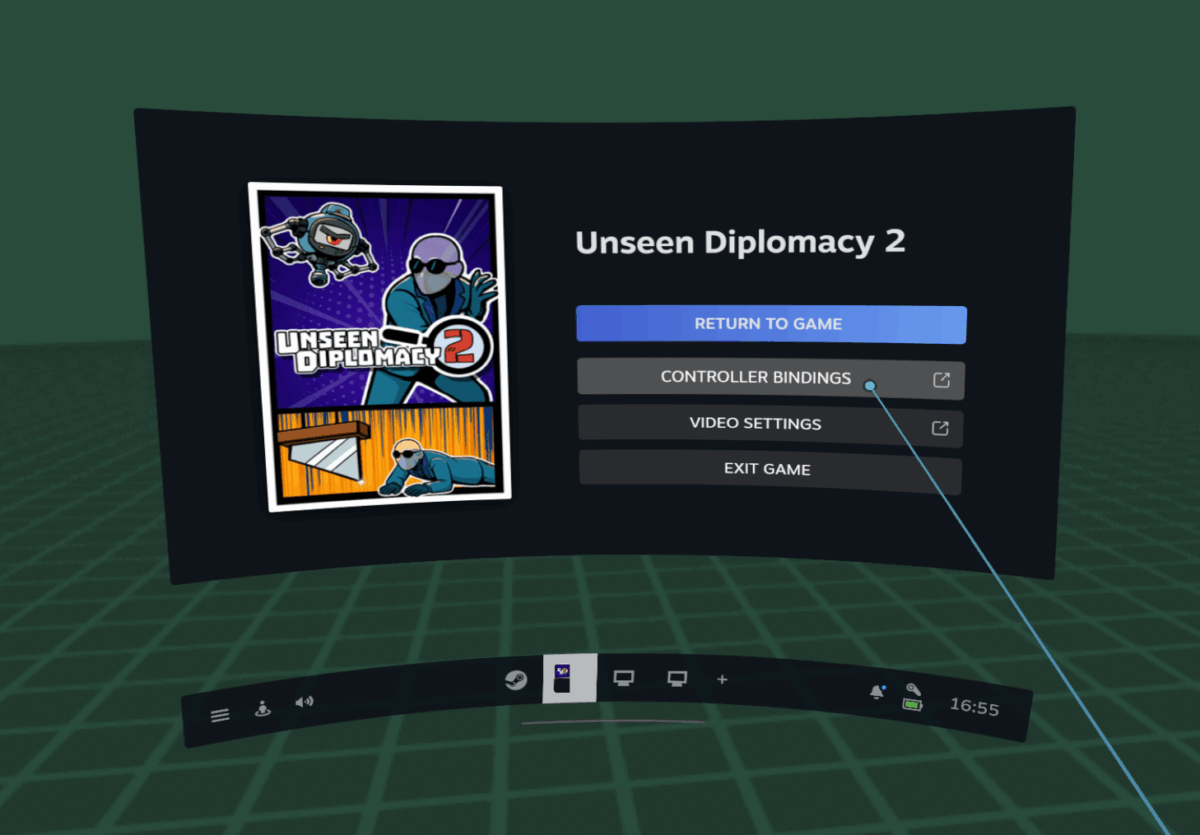
To get to the controls window, start Unseen Diplomacy 2 and then press the system button to open the Steam overlay. Select the game’s tab from the bottom bar, then press the ‘controller bindings’ button.

Change the ‘active controller binding’ to ‘custom’, and then select ‘edit this binding’.

You’ll now be editing your controller bindings for whichever controllers you’re currently using. The columns on the left and right show which actions are bound to which hardware buttons, and you can add, change or remove them as you need. You can set different actions on the left and right controllers.

Once you’re done, press ‘save personal binding’ at the bottom, give it a name and description and press ‘save’.

Now you know how to edit the controls, let’s go through the available actions and what they actually do in game.
Basic actions
These are the actions for interacting with the world. If you play in ‘Full Sim’ mode you only need these actions.
Pick up / Grip
This handles picking up and dropping items, and gripping objects in the world (like drawers or cupboard doors). Can be bound to any button.
Use
A context-sensitive action that uses whatever gadget the hand is holding, like snipping with the wire clippers or taking a photo with the camera This can be bound to any button.
Analog Use
An analog action that some gadgets use alongside the regular Use action. For example when holding the wire clippers this will control how open or closed they are. Typically you’d use analog input (like the trigger button) and bind both Use and Analog Use to it. If you’re using a non-analog button for Use, then leave this unbound.
Inventory
Toggles your inventory open and closed. This can be bound to any button.
Navigate
Used for artificial locomotion. If set to ‘arm swinger’ in-game, then hold this and move your hands to walk. For ‘hold button’ artificial locomotion then just hold this button. Tapping changes your crouch state (if enabled in-game).
Ui Select
Used to select items in menus with the laser pointer.
Menu
Press to open the pause menu.
Locomotion actions
These actions are used when you’ve enabled the various artificial locomotion modes.
It’s important to realise you can bind multiple actions to the same hardware input. By default both ‘walk’ and ‘strafe’ are bound to the left stick, which means that it will move you around like traditional FPS controls. But you could instead put them on different sticks or put ‘walk’ and ‘turn body’ on the same stick for a different control scheme.
Walk
A 2d action (ie. joystick or trackpad) which controls walking forwards and backwards. Only used when the ‘direct control’ artificial locomotion setting is enabled in-game. Only uses the vertical axis.
Walk forwards / Walk backwards
Digital actions for walking forwards and backwards. Useful if you want to put walking on a D-pad or face button.
Strafe
Similar to Walk, this is a 2d action which controls strafing left and right. Only used when the ‘direct control’ artificial locomotion setting is enabled. Only uses the horizontal axis.
Turn body
A 2d action (ie. joystick or trackpad) which controls turning left and right. Only used when artificial locomotion is enabled in-game. Only uses the horizontal axis.
Turn body left / Turn body right
Digital actions for turning left and right. Useful if you want to put turning on a D-pad or face button.
Slip Through
Press to toggle ‘slip through’ mode so you can move through small spaces. This is only enabled when using some form of artificial locomotion, otherwise it is not used.
One handed mode
UD2 supports ‘one handed mode’ where you play with just one controller. This mode is turned on automatically if only one controller is connected, and will switch back to two-handed if a second controller is connected.
There are a bunch of adjustments this makes across the game:
- Your wristwatch moves to the inactive hand, and is positioned where you can access it.
- Your inactive arm extends when opening the inventory so you can access items on it easier.
- Climbing is made more forgiving, with a longer coyote timer
- Artificial locomotion changes to ‘one handed’ inputs
Walk (one handed)
Behaves like the ‘Walk’ action, but is used instead when in one handed mode.
Turn Body (one handed)
Behaves like the ‘Turn body’ action, but used instead when in one handed mode.
By default these are bound to both joysticks, so that whichever controller you use in one handed mode you can still walk around freely.
Final Thoughts
Remember you don’t have to bind every action. Certain actions are only used in certain artificial locomotion modes, so if you don’t play with those then you don’t have to bind them.
Depending on the controller Steam may let you bind an action to a button which is actually reserved by the system and not available for use in-game. For example clicking the thumbsticks with Windows MR controllers brings up the WMR menu. In that case you’ll have to use a different input.
If an action doesn’t show up in the list when you’re trying to connect it to an input then that means the input is of a different type. For example you can only connect 2d actions (eg. Walk) to joysticks or trackpads. You may need to remove the binding by clicking the trash can icon, then the add icon and choose a different binding type from the list.
You can use the ‘toggle button’ input type if you want to change an action from being a ‘hold’ to ‘toggle’ behaviour (select ‘toggle button’ from the list when you add an action).
If you come up with a control scheme which you think is useful to other players, you can publish it to the Steam Workshop (click ‘publish to workshop’ at the bottom after saving). Make sure to write a useful description so that other players know why they might want to use it!